Sunday, March 14, 2021

OPEN WATER -THE TALE OF A BASTARD, BLUES AND BELLIGERENCE


Well, the ice finally came off early last week, following a nice warm spell that lasted about 5 days with a lot of wind.  Of course, I had to put everything on hold and start hitting the open water.

I had hoped to find some slightly active fish in the shallows, but the lake nearest me allows for a quicker drive, even though it is a little deeper than the other one.

I know from experience that the time of day is pretty crucial for this interim period.  It tends to be more of a daylight bite, although twilight can be especially good if you hit everything just right.  And I know guys that swear by a night bite although according to my records on this specific lake, that bite doesn't happen for a few more weeks...for me and the techniques I tend to use.  Still, I had a whole bunch of new things I wanted to try and felt that maybe I could get on some fish quicker by trying them.

While I was slightly optimistic, I still had doubts.  And rightfully so.  The first week of open water has been nothing but brutal.  

I fished about 8 different spots every night that according to my records on this lake are typical producers this time of year, albeit it daytime and twilight producers.

No dice.  If I could sing and sound like anything other than a cat in a bag getting beat by a stick, I would have belted out some blues.  But then again, thats exactly why I don't sing and fish instead.  

It would have been easier to hang it up for another week or two, but if I am anything, I am a persistent bastard.  I shifted the hours I went out, downsized/upsized offerings, went through proven and established lure types, fished different structure...  All in an effort to figure the fish out.  

One thing I noticed was an increasing number of panfish moving into the shallows.  Bluegills and sunnies...even a few smaller bass.

Always a good sign because where the food goes, so do predators.

By this point, having been out fishing 20 times for the year and only having about 12 fish to show for the effort, I was really starting to doubt my ability to figure this out.

When in doubt, go to something you are positive no one else is throwing...in this case, I had an ace up my sleeve.  By making my own baits, I have colors and patterns NO ONE else has.  Whether its blade baits, cranks, jerkbaits, spoons, stickbaits or soft plastics, I always have something on hand that hasn't come out of a box store.  

The reason for this is that I feel fish become patterned to the offerings that come out of the box stores.  Its what readily available and people throw those colors and patterns all the time.  Its one of the reasons the firetiger pattern, which should be a given with the murkiness on this lake, fails repeatedly.  I love that pattern and it works for me everywhere but this lake and one other lake that is heavily pressured.  

Taking the ultra cool water temps into account, I figured it was a safe bet the fish were bottom orientated and relatively close to the shoreline.  They were also not going to be terribly active.  This typically leaves a very small strike window as they were not going to chase down anything.  Thus a jig was definitely called for.

Let me be clear.  I had used jigs and soft plastics a number of different times during this first week.  Different retrieves, longer pauses, different colors and different weights.  All had drawn a blank up to this point.

The night before this happened, I was out tossing some husky jerks and using long pauses, upwards of about 30 seconds between slight twitches.  I snagged up on some of the rocks on the retrieve.   So I flipped on my headlamp and was greeted by a set of eyes staring back at me.  There was a walleye, roughly about 22 inches long, laying on top of the rocks in less than a foot of water.  Probably no more than 12 feet away.  And even with the light on, he didn't bother moving.  

My jerkbait however, was still snagged in the rocks behind this fish.  I drew the line tight and tried the old bowstring trick and it worked.  The jerkbait popped free.  I turned the headlamp back towards the fish and he is still sitting there.  So I worked the jerkbait as seductively as a I could towards him.  He moved up right next to it, within an inch or two of the bait and followed it sideways towards shore, almost like a sidewinder.  When his back broke the surface of the water, he shot back out towards the deeper water, leaving me nothing but frustrated.

But that experience told me one thing.  The walleyes were in the area.  Nothing huge, but pretty nice sized fish.

So fast forward to the next night when I tied on a quarter ounce  ball head jig and slapped on the two tone twister grub I like to call the Missouri fathead color.  First cast out the jig never hit bottom.  A nice bass about 15 inches popped it on the fly and minutes later, I had him beached, unhooked and released back into the water.

I felt damn good.  That dry streak had ended, but I wasn't out after bass.  I wanted some walleye.  Keepers and not anything too big.  Since this is a small lake, I limit myself to a few limits per year, so anything over 19 inches goes back unless its the cold water period of fall and I have to get my wife some limits for the winter months.

A few casts later, I felt a familiar tick just after the jig hit the bottom and I set the hook.  At first I thought it was a bass, given the way it fought, but as I flipped on my headlamp, I caught the glaring orbs of a nice keeper walleye heading my way, my jighead readily apparent in its open maw.

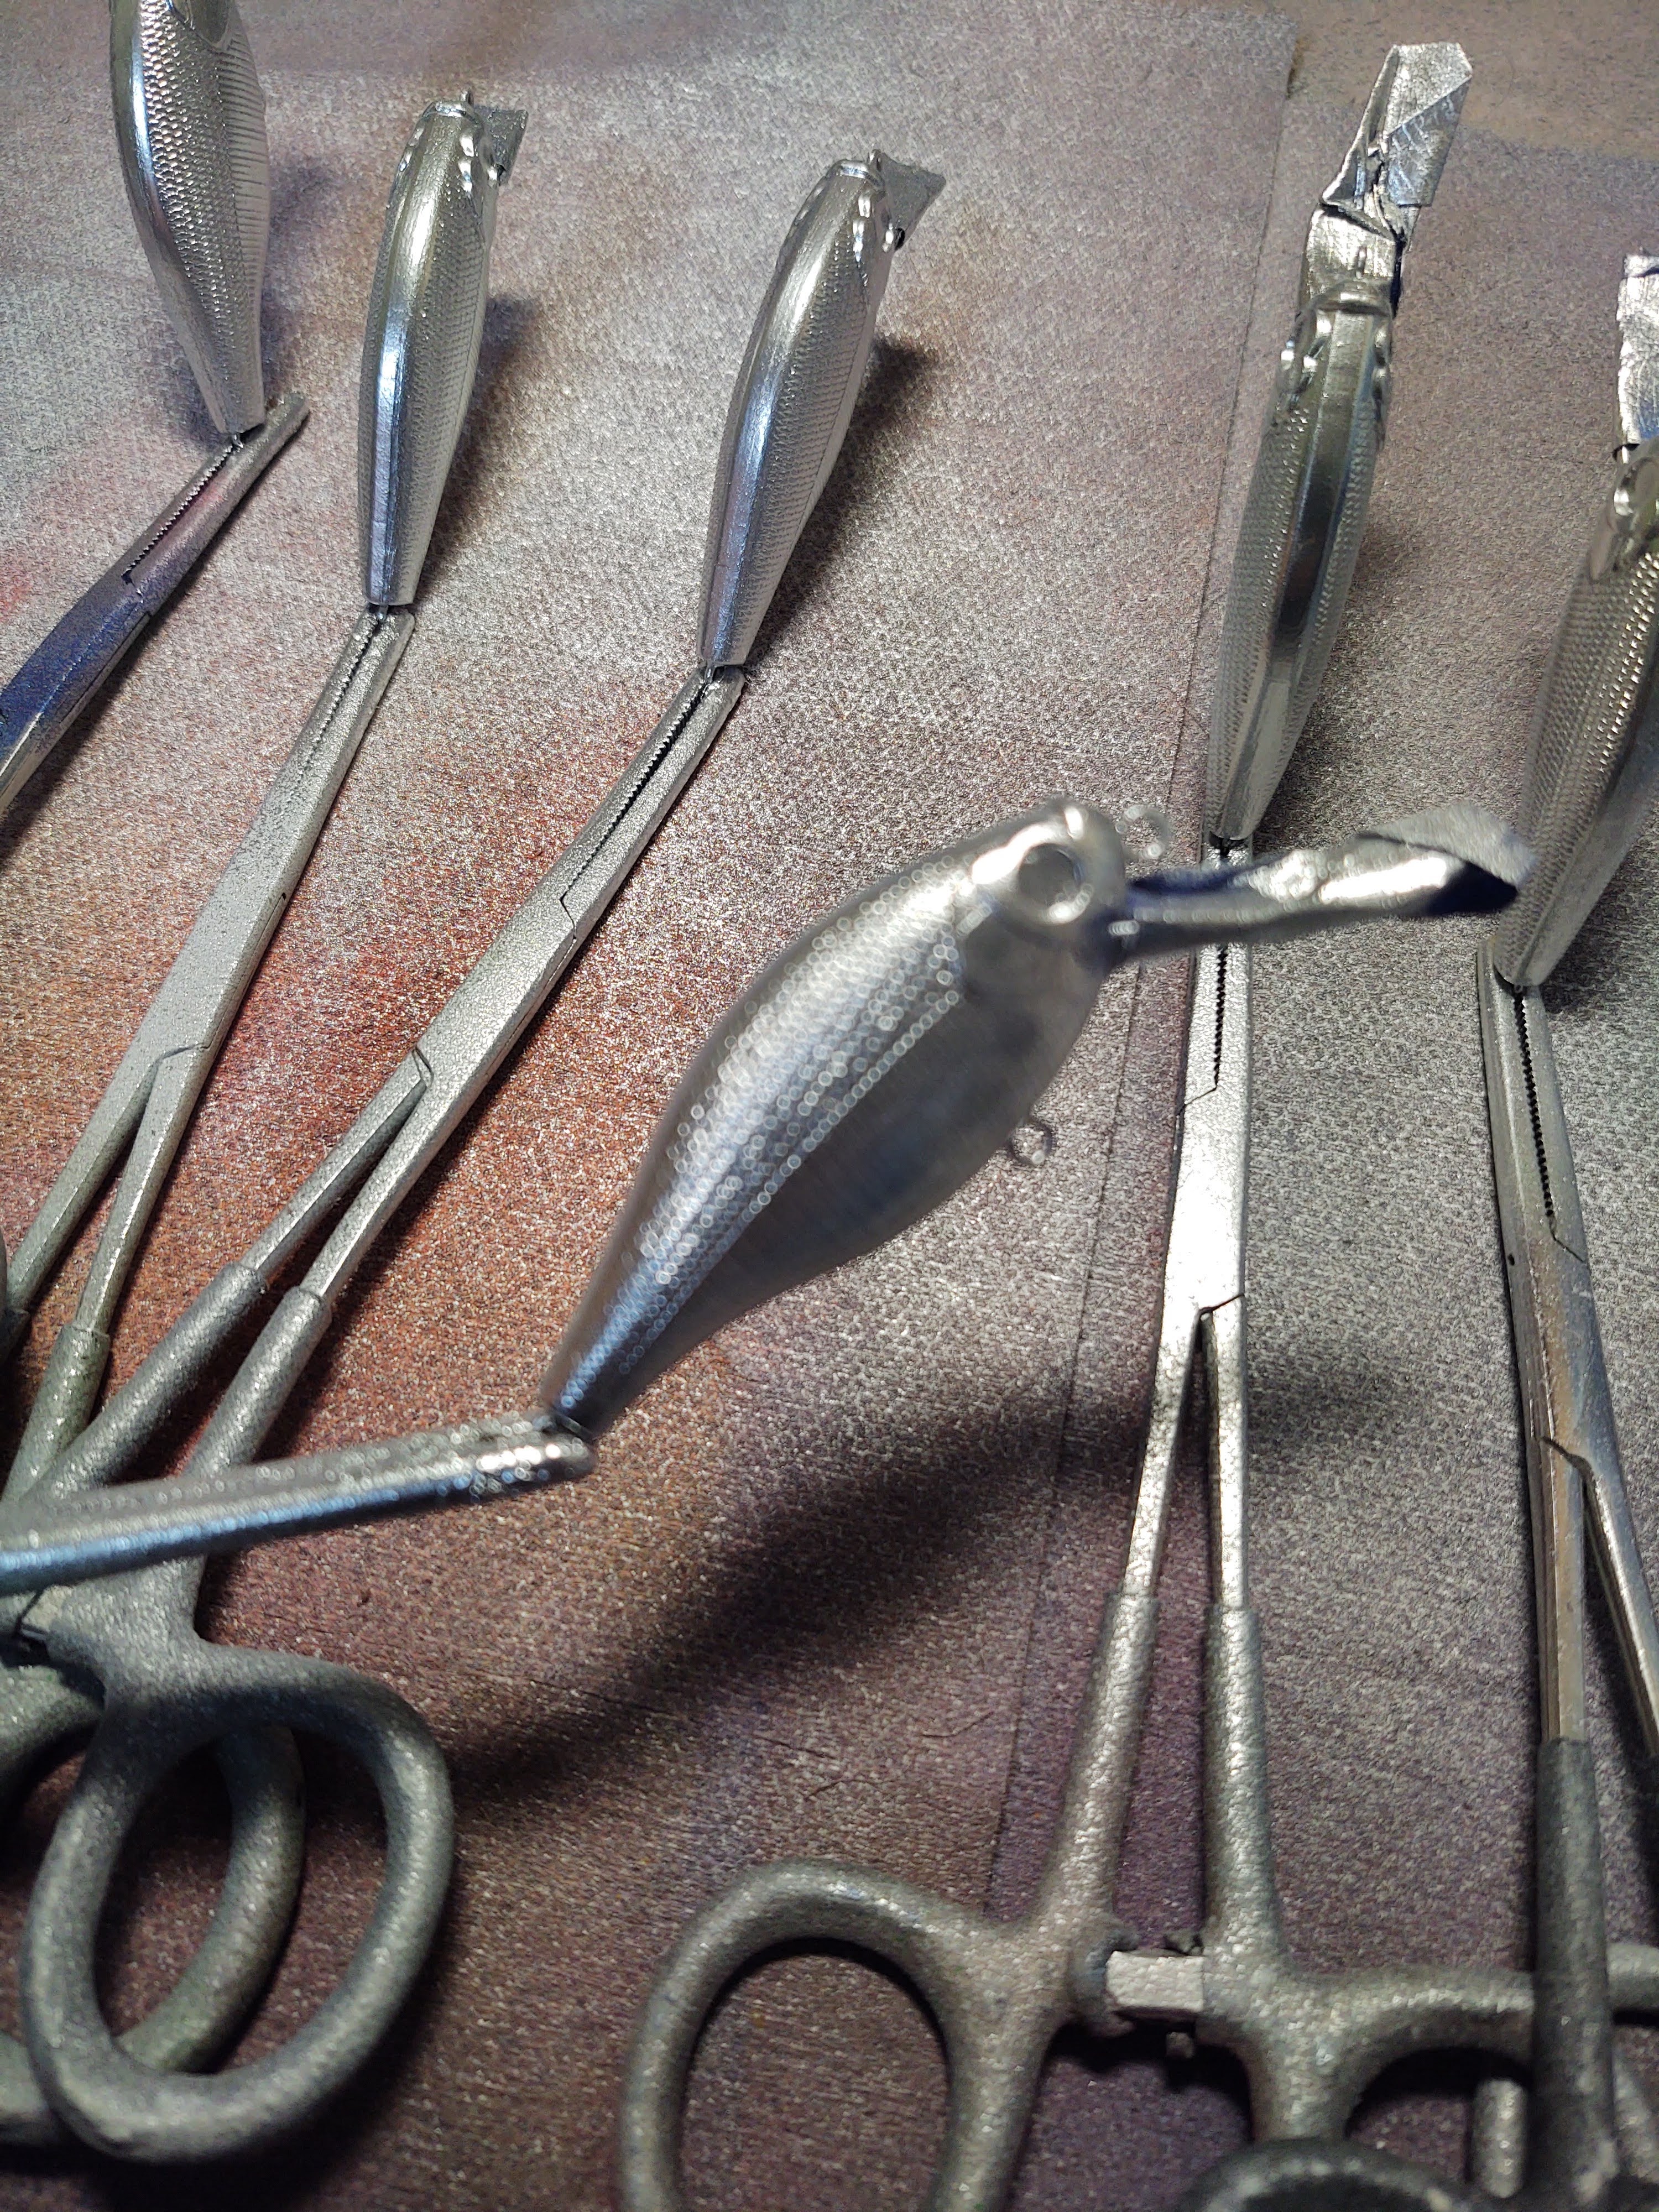
As you can see from the intro photo at the top of the page, the fish was a nice fish, but nothing the size of the walleye I had seen the night earlier.  For some reason, I felt very generous and immediately released the fish back into the water, despite looking for keepers.  I just had a hunch it was going to be the only one I caught the rest of the evening.  And sure enough, about 15 minutes later, the wind picked up, the temperature dropped, the smell of rain became prevalent and the fish developed lockjaw.  

The point I am trying to make with this is that I really had to work for those fish.  It took me a week to get into them and this was after a prolonged warming trend, and beating the shoreline like a mad dervish.  Since then, the temperatures have once again plummeted, the rain is forecast to last at least three more days and the winds  have put a nasty bite into the even air that magnifies its teeth upon wet clothes and skin.  

I don't feel the fish will move out to far from where there are now given the proximity to spawning and the forage that has moved into the shallows.  That doesn't mean they are going to get any easier to catch either.  At least not for another week or two.  

I will still go out after them on a daily and or nightly basis depending on my work schedule and days off, hoping to learn even more about their habits and behavior in inclement weather.  And the reason for this is quite simple.  One can never count on the weather being "perfect". 

Its up to us to adapt as the weather changes on us in order to stay on active fish.  And the more experience one gathers from fishing in crappy weather, the better one can adapt to when the weather does change.  You have a base of experience to draw upon, change your tactics and increase the odds of your angling success.  You increase those odds again by fishing as often as you can.  I've mentioned before it is easier to make adjustments and fine tune your presentations when you know where they are at and stay on them.

Does it suck to fish in 30 degree weather, in the rain and wind, at night, with nothing but artificial lures (by choice) and come up empty handed?  Yeah, but with that experience  You are also developing the ability to ignore the weather and concentrate on the task at hand instead of being miserable and thinking about how cold or uncomfortable you are.  Its a mental game, mind over matter....if you don't mind, then it doesn't matter.  And there is a lot of truth to that.

Anyway, get your gear ready people.  Open water is here and the fishing is about to get really good soon.  No sense in waiting until the last minute to get your gear in order.  Make it count.

Until next time.

Keep those lines wet, those hooks sharp and the fish afraid.


Sunday, February 21, 2021

BUILDING YOUR OWN UV BOX FOR BLANK SEALING


So, here we are, in the middle of the cold water period.  There isn't too much open water left and the water that is open is hit or miss in terms of success rates.  Usually around this time of year, I fill my down time with various projects, including painting crankbait blanks.  

Normally, it is color combinations I haven't seen before, or trying to replicate proven patterns.  Lately however, I've been shifting my attention to natural patterns in part to try and tempt fish that have seen everything off the shelf from the local big box stores.

All of this is all well and good, but eventually, when I am done painting them, the unenviable job of sealing them comes to the fore.  The only thing worse than that is actually putting the split rings and hooks on them.

Years ago, I used to use concrete sealant, but that was a very stinky job, with noxious fumes and it stunk up the garage and the house.  Not to mention, it probably posed several fire hazards and skunked out the tackle box for weeks.

Enter a product called AlumiUV.  Its a UV resin, when applied to baits and exposed to UV wavelengths of 365nm or better, hardens into an almost indestructible coating that protects my paint jobs and makes the blank water tight.

One of the biggest issues with this product is making a UV box that will adequately cure your bait once you hang them in it.  Below you'll see a picture of this ugly first guerilla build with some baits hanging in it for good measure.

As you can see, the box is hardly adequate for the number of baits I typically seal at one time. 

A new box is definitely in order and I thought, why not show everyone how easy it is to actually build one of these boxes using materials I already had on hand, or something someone could get pretty easily. 

So I decided to use an old cupboard I had tucked away in the basement that wasn't seeing any use.  It was doubtful if it would see any use as my wife totally hated the color I stained it, so there's that lol.

Now, the lights I have are good lights.  Not optimal but they can cure a bait hard as a rock within 8-20 minutes of direct exposure, which is plenty of time for me.  

But those two lights in an old cupboard were not going to get the job done in this big of an area.  Too much open area to adequately cure baits over a large area. Thus, I needed two more lights minimum.  Preferably bar lights  or at least two more of the same type I currently have.  

After doing some thinking, I opted for buying two more of the same type I had.  Two lights, each pushing 385-400 nm UV wavelengths.   They were the same strength I had in the old box.  The optimal wavelength is 365 nm but the prices are a bit outrageous in my estimation.  

The manufacturer of my old lights was out of stock so I had to do some digging to find some that were comparable.  Finally, after about an hour of searching I found some I thought would work as well.  So I ordered them late last weekend and they arrived Friday. 

Only a bit different in terms of size and light arrangement, but still the same wattage and working light angles. They ran about 50 bucks for 2 of them if I remember right. 

(If you look closer, you can see a bunch of other items I planned on using for this project.)
And now for the box. 

I mentioned I had an old cupboard I planned on using. I dug it out of the basement nook it was hiding it and dusted it off.  It was a cheap storage cabinet from Menards that ran me roughly 40 bucks back when I bought it.

Roughly 30 inches long x 12 inches wide x 12 deep.  Plenty of room for curing baits, provided I could get the UV light brackets installed in there.

This provided plenty of potential and also left room to expand into some future directions, if the needs arose.  


I needed to remove the door to get adequately started on this project.  Grabbed my electric drill, and proceeded to take the screws out of the hinges and set the door off to the side.

Next I needed to drill out the holes that would serve to hold the 3/8" 3' dowel I had.  The dowel would be the stable surface I hang the coated baits from to dry via large paper clips.

I used a 3/8" bit and just drilled where I had marked the holes a week earlier.  That mark was centered  width wise, but located 2" down from what would be the "new" top of the box.

This height allowed for the curing of larger baits, up to 6".

For bigger baits, like the 10-12 Grandma blanks I occasionally paint, I will have to put in some hooks beneath the dowel holes, remove the dowel, and then tip upright to get the height I need.  
It was at this point, I knew I had to drill the hole where I would be running the electrical cords out of once I mounted the UV lights inside. 

I knew I was going to be running the cords along side the box on the outside and plug them into a power strip mounted towards the rear of the box,  so I opted for a more centrally located hole.  I used a 1 1/2 inch drill bit  to create the hole to run the power cords through. 

I also took the lights off their brackets and placed the brackets inside the cabinet, marked out the bracket holes for the bolts and drilled them out.

After I had finished with all the drilling, I took a small hand held vacuum and cleaned up all the sawdust out of and around the box.

Beings I have already built a UV box before, I knew I wanted to do some things differently with this one. 

First on the agenda was using aluminum foil and keeping it affixed to the sides without the use of duct tape.

So I opted for some adhesive spray from Elmers.

It worked perfectly and allowed me the flexibility to smooth out most of the wrinkles and reposition the foil until it was in place.
I started by unrolling enough foil to cover one side lengthwise with about three inches extra on each side.

Once I had the sheet, I flipped it over so the duller side as facing me, sprayed it with the adhesive and then carefully inserted the sheet into the cabinet and did the bottom.  The extra length on each side was folded onto the opposing surface.   I repeated the process for the other sides and for the door also and found out with enough coaxing, I could almost "blend" the extra  foil into the sheet I had previously placed with just some finger pressure.  

I almost opted to get out the old rolling pin I had in the kitchen but not sure I could have gotten it to fit well enough to actually make a difference.

This is what the inside of the box looked like when I was finished and had the door reattached to the cabinet.  Not perfect, but still pretty damn good.

One thing to remember if any of you choose to build a UV bo is that mirrors, or silver paint really don't work that well with UV lights.  I had the same thought but before investing in either of those things, I figured I needed to do some research. 

Not sure now but I seem to remember reading a thread where someone was explaining how mirrors actually tended to absorb or change the wavelength pattern of the UV light and render it ineffective.  Silver paint didn't offer enough reflectivity to make it worth the effort.  

You can see the hole I drilled in the cabinet at the bottom of it.  That is where I planned to thread the wires.


I opted to put some round felt spacers beneath on the bottom to help ensure I had enough clearance between the cabinet and the desk with the bolts I was using.

These were some I picked up at Menards.  A set of 8 from Gorilla Glue ran me about 6 bucks.  They are pretty thick and hold great and allowed for enough clearance.

You can see the holes I drilled for the light brackets between the spacers.

The next step was to actually was to flip the cabinet back over and set the lights in there. 

Since I already had the holes drilled, It was simply a matter of placing the lights and brackets back in, threading in the screws and tightening them.

Be advised, its a tough operation since there isn't much clearance beneath the light and bracket but it can be managed.

After I had them mounted, I threaded all the the wiring through the central hole.

I didn't bother putting in any cable holders or tying them up on the inside at this point..  Not really necessary plus it ensured I had enough cable to reach just about any place I decided to place the power strip.

I did use cable holders to secure the power cords to the outside of the cabinet/UV box and then attached a power strip towards the back of the cabinet.  

This prevent the loose cables from cluttering the area, sticking out and gave the box a cleaner look.

The power strips position in the back was more or less to prevent any accidental powering down, plus it only had a 2 foot cord so it was easier to reach the wall outlet with it there.


Once everything was plugged in, it was time to turn it on and see how everything looked.

I powered it up and was pretty pleased with how it turned out overall.  I noticed some slight discrepancy in the lights right away, but after using it already, it only takes a few more minutes to cure baits with the new ones.

One of the perks of the new lights was that they had their own on and off switches so I can turn them off if I do not need to use them to cure anything.  Plus, the bigger baits would not hang down far enough to use their lighting.

After using this box a few times, I can see I could have probably gotten more powerful lights to help increase curing times, but since I am not painting baits to sell at this point, curing time is not really that critical.

When I do start to sell them, then I will have to upgrade the setup, but with this setup, upgrading to bigger lights should no be an issue.  I could also install some smaller light bars over top of the lights currently in place to increase the level of UV exposure the baits receive.

So there you have it...A relatively easy UV box build based mostly on material I had on hand.  Overall cost of the project would probably run close to 150 bucks or slightly more, all depending on the lights one buys.

Here's hoping you all get some use out of this article in the future.  And if anyone has any better methods or suggestions, feel free to post them in the comment section below.

Now its time to fire up the airbrush...I got baits to make.


Saturday, February 13, 2021

GENERIC BLUEGILL PATTERN


It's been a bit cold here the last week .  Took a little break from the madness in the Lure Foundry and headed out to the lake to check on some things.  Looking over the vast swathe of ice covering the lake in all but a few places brought my thoughts back to warmer days and the expectations that inevitably follow.

One of the things I thought about was the importance of the bluegill in this lakes food chain.  I know I've brought it up before in other articles, but it got me to really thinking on how despite all my crankbait painting, I really don't have a generic bluegill pattern I can just throw anyway and expect to catch some fish.

The problem there is the invariable and infinite color variations one finds in bluegill, hybrids and sunfish.  

Another problem is that if one tries to really replicate the colors those fish sport, you tend to get a really dark patterned bait that only darkens further once you put the clear coat on.  There is a fine line to walk when painting crankbaits that is far to easy to cross.  

On the flip side, having a lure that is slightly different than what most predatory fish see can be a bonus.  If it is close enough to the usual selection of forage they see, but slightly a different color, it sets the bait apart from everything else, effectively making it a target.  

So, after I got home, I got out the airbrush, arranged the airbrush paints, pulled up a photo of the lightest bluegill I could find with spring and summer colors and put together a quick plan to see if I could 

As you can see with the nearly finished bait, the bluegill I found on the internet was rather light and even after I finished painting the blank and held it up to the photo for comparison, it was still a bit dark.

I felt it still might be a step in the right direction.  As it is, I also feel this lure might be a better option since most bluegill are typically darker in this area of the US.

I opted for the the basic shad rap crankbait blanks I got from a US based distributor.  The shape is close enough, definitely the right size and dives deeper than the usual crankbait body I use.  They have run well in the past, usually need very little tuning and tend to be tough enough to handle bigger fish.

An even better reason is the fact they seem to be easier to paint than other styles of crankbaits.  Every crankbait painter I know has favorite body style that work well with how they paint.  Given enough time and choices, one will always find a few that fit.

So without further adieu, lets get this show on the road so you can take this pattern and use it to put your own spin on it.

I started with a body I had primed flat white with Rustoleum spray paint.  This is how I usually start most of my patterns for future reference.

I then mixed up a classic bone color.  I tend to use about 4 drops of createx white then add 1 drop of opaque yellow. 

 As I mentioned, I wanted this bait to a bit brighter than usual since I know the colors will darken with the clear coat application.

I painted the bottom half of the bait with this bone color.  Doesn't have to be exact as I have seen tons of bluegill with varying shades of this color in a range of body locations.

I've said it before and I'll say it again.  Nothing in nature is perfect so don't be too worried about taking the bone color the body further if you need to.  Also, make sure you paint the belly this color also.

Without cleaning the airbrush of the remaining paint, I then added a few drops of fluorescent orange, to give me a creamy orange coloring along the shoulders.  I paid special attention to avoid the head area of the bait.

If you noticed, in the photo of the finished bait. you don't see any of this color.  One might ask why even bother laying down that color if it is not going to be seen.

The answer is it is not meant to be seen, it is meant to help slightly change the hue of another color I'll put down later. 

This was something I discovered quite by accident.  I liked the end result and filed it away for future reference.  depending on the color, it can produce remarkable transitions that are not easily replicated by any other methods I am currently aware of.  
Additionally, it saves me time trying to mix up another  color later on in the process.

Again, without cleaning the brush of the remaining paint,  I add a few more drops of fluorescent orange to lay onto the breast area on the bait.  I target the lower hook area.  That orange is a draw and serves to help focus most strikes.

It is also a common identifier on a bluegill and other sunfish and perch.  Kind of an forage marker that says "eat me" and is understood by every predator that swims...  


I cleaned out the airbrush and put in a few drops of createx Pearl Lime color and lightly hit the back and overspray the shoulders lightly.

Remember, I was looking for a brighter looking bait and to achieve that, I had to have a lot of lighter background colors on the bait.


I started working on the head and gill area of the crankbait with 
a few coats of the pearl Lime until I get the depth and darkness of color I wanted.  

Once I was finished, I added a few drops of Folk Art color shift green Flash and a small drop of transparent gray to the remainder of the paint in the bowl to get this color 

Seems like kind of an odd mixture, but the tonal value was already there, I just needed a darker hue.  Adding the grey achieved that end.  

I went over the back and was even more subtly over spraying the shoulders.  I wanted a visible transition area that didn't take up too much space along the bait sides.  This fit the bill nicely.  


I opted to use a fine tooth comb and sprayed through it onto the bait to get the striping pattern I was looking for.  

If one notices, the stripes are slightly darker and sprayed with much less pressure than the rest of the bait pattern. I added another small drop or two of gray 


Went over the back at slightly lower air pressures with sepia in an effort to try and bring out the striping and give the bait a more lifelike look.

Rather than clean the sepia out of the brush, I added a few drops of black, got out my home-made blue gill "ear-flap" stencil and painted the ear flap with light low pressure passes.


Now all I have to do is add eyes, split rings and hooks and these bad boys are ready to rage!

They are indeed lighter colored baits, but are also readily identifiable as a bluegill pattern. 

I should state, that this generic pattern has a lot of possibilities.  Change a few colors and you'll still have something that looks great to most predatory fish.

Enjoy


Monday, February 8, 2021

BOGSTALKER PERSONAL UPDATE: FEB 7 2021


Just a quick update on some happenings going on here and why updates and new blog articles are slower in getting onto the web than previous months.

  • Been super busy getting new crankbaits painted for the 2021 campaigns.  Since I've been leaning towards more natural patterns, its been taking a bit longer than usual as there are more steps involved in getting realistic looking baits painted, sealed and ready for the water.  

  • The above point segues into another facet of my bait painting.  I've been busy painting jigheads, bladebaits, spoons, flashers, dodgers etc. 

    If it can be modded or customized, odds are its here in my shop waiting to get some paint thrown at it. I am absolutely sure that at times I look like a primate screeching and hurling things at bait blanks but thats a story for another day.  

  • The weather needs to be a bit warmer in the coming weeks to get some plastic baits poured.  I don't have an outdoor heated shop so I am at the mercy of the elements. Going to be pouring a lot throughout the year and while I am at it, I'll be taking photos, etc and posting how to articles on how to get it done and finding out what works for your lakes.  There might even be some videos if I can find a video camera that won't break when I look into it.

  • Ordered about 400 new crankbait blanks online in about 6 different styles.  Should be at the Lure Foundry here in a week or two.  Again, mostly natural patterns but there might be a few surprises thrown in there.  Have a lot of requests for specialized baits.  Have a lot of ideas for baits in my personal stash too. Hoping to find some time to get them done.

  • Sitting on about 300-400 different colored and length hoochies.  Obviously, I need to get some of those hoochie rigs made up before the early summer trips to Oahe start.  Still working on wrangling up the other supplies needed for the hoochie rigs.

  • Hagens backordered my order of 5" kwickfish blanks.  Im kind of pissed.  This is like the 4th time they've backordered stuff and it usually takes weeks if not months to get what I ordered.  Probably going to be the last time I order anything bait related from them.  

  • Walleye worm harnesses of all types are going to be in the works and I should have some made up by early April in preparation for  post-spawn walleye fishing.


  • Still working on getting the Spin-n-glow rigs made up.  They're an under-used option for salmon and I want to see if I can manage some Kings or Atlantics on them this year.  

  • Working on some ideas for a new versa-track tarping system for the boat ( ie the Mistress, ie High Plains Drifter).    It will replace the "pvc skeleton" I made up last year to get a better fit to my Tracker Pro V 15DLX.  Having a great fitting tarp can help you shave some mileage off long trips and with as often as I head north, saving mileage and gas is a huge plus which can translate into savings that cover 2-3 extra trips, so yeah, that is a huge deal that I have to get accomplished by late April.  

  • Recently came into possession of a buddy's entire fishing magazine collection.  He was getting ready to move and had 4 decades worth of magazines ranging from In-Fisherman, Bass Master, Bassin, etc.  Have to go through them and get them organized and added to my own library.  Might take a while.  Lots of magazines.  Lots of information I've never seen before, so this is super exciting.  Thanks a bunch Dave Abler!

  • Keeping the goals and objectives I had set at the beginning of the year is obviously a huge deal if I expect to meet them.  Fishing season for me really kicks off at the beginning of March so that is going to do some biting into my time.  Will be travelling to some different lakes and rivers this year so there will be more drive time involved.

  • My real world job is picking up with no end to 60 hour work weeks really in sight.  Not that huge of a deal since I tend to work 60's anyway.  Still usually by early summer, the hours get trimmed back a little and I find a little more time to hit the water.  This year, that might not happen, so I am a bit worried about that.

So obviously, you are catching my drift on the current status of pending updates.  There may a little lag time between articles or posts, but I will definitely get them put up as often as I can. In the meantime, make the most of things and get your gear ready for the upcoming season.  It'll be here before you know it.


Friday, January 29, 2021

GIZZARD SHAD QUICK TIPS


One cannot simply grasp how important Gizzard shad are to our water ways as a bait fish.  They are literally the meat and potatoes and everyday fare of too many species to count.  There mere presence in most reservoirs is a good indication that there are going to be some really nice game fish present,  If that water way boasts a healthy and properly managed shad population, you can bet those gamefish you target are going to be "thick".

Looking at the distribution map above, one can easily see these little guys are adaptable to a wide range of waters and temperature ranges, making them the preferred forage stocking option in most of the country, although that option does come with caveats.

They have high growth rates and if they live to age 3, they are starting to reach the size where they are too big of forage for most fish.

If they do reach this size, they then can rapidly become a detriment on the waters ecosystem, straining available resources for almost every other species of fish.  Quite simply, introducing them is the easy part.  Managing their numbers and size effectively is quite another.

 A BRIEF LOOK INTO SHAD IN MY AREA

I fish a few lakes that have shad present.  Chief among these are the Lake Sharpe, Oahe and Lewis and Clark Lake, all reservoirs on the Missouri River system, so I am going to use them as an example 

From what I have researched, Gizzard shad were already present throughout the Missouri River system before any of the dams were built.   Once they were built, Gizzard shad were not present in  after Oahe was finished.  Thus, it seemed that Oahe seemed to be the northernmost limit of their range.  

It wasn't until the late 90's that gizzard shad suddenly started appearing in survey nets that biologists  knew something had changed.

That something was shad stockings in western South Dakota reservoirs.  Shadehill and Angostura.  These stockings happened in the 1990's in an effort to help increase the forage base for walleyes in those reservoirs.

Mother Nature had other plans.  The mid- late 90's saw a lot of high water years and as a result, gizzard shad passed through or over those spillways and found their way into both the Cheyenne and Grand Rivers.  Once they were present  in those systems, it was only a matter of time before they followed the tributaries to Oahe.  

 Since then, Oahe has had a growing shad population.  Lake Sharpe already had a healthy shad population. Lewis and Clark shad were stocked a while ago and from I hear, are doing well..  They are now an important part of those ecosystems  and for now, it seems that they are in a healthy balance. 

So, in an effort to actually use this to our advantage, we need to understand some basic facts and info on their patterns and behaviors.

Since I fish both these reservoirs quite frequently, I wanted to know all I could about them.

SHAD QUICK FACTS

It seems through all the documentation I've read through so far that Gizzard Shad in these reservoirs tend to spawn in mid to late May or when the water temps heat that magic mark of 64-69 degrees F. 

They prefer to spawn during stable or warming trends.

By August or September, the young shad become large enough to attract the attention of predators like Pike, White Bass, Smallmouth, and walleye.  Its unclear if Chinooks or Atlantics (In Oahe) prey upon them at this point, but my instincts tell me if they do, it would be juvenile fish only.

Shad prefer quieter open waters or the edges of strong currents.  Optimum habitat for them is fertile shallow bodies of water that are warm, with soft muddy bottoms, low predator counts and high turbidity.  Unfortunately, if they find such places, that almost always leads to an overpopulation of shad.

Changing water levels, deep clear water, steeper shorelines and moderate to heavy predation all lead to lower gizzard shad populations according to several papers I researched.

Another item of note is that Gizzard Shad typically feed during the day and try to minimize their activity in low light periods.  

They also feed on detritus and mud.  One can make a fairly logical assumption if you can find mud flats with a few of those optimum habitat variables present, shad should be present or somewhere near by, at various times of the year..

The behaviors I have mentioned are fairly typical of gizzard shad.  How they apply to the bodies of water each individual fishes is open to each individuals interpretation of available shad preferences.  

Make educated guesses, get information from the locals, observe surface activity (gulls tend to be good locators of shad)...try to put all those pieces together and give yourself a better chance of connecting fish.  

Just remember, those predators feeding on shad may not be immediately nearby, but chances are pretty high they are relatively close.  Look at structural elements, cover, current etc to try and further define viable fish locations.  


Keep those lines wet, those hooks sharp and the fish afraid.  


.


Tuesday, January 19, 2021

THE BOGSTALKER SHAD PATTERN


So I am sitting here in the man cave aka Lure Foundry thinking about a lot of different aspects of the 2021 fishing campaigns.  One of the things I usually do over the winter months is paint cranks or bladebaits.

The current craze is offbeat customized color patterns.  Crap that looks like someone was unaware of color compatibility and complimenting.  But that's probably the point I suppose.  Giving the fish something they've never seen before just to get their interest.

I cannot say I am a huge fan of these far out color schemes.  Especially the generic  yet still off the wall patterns predominating most of the tackle shop aisles. Go to any of the chain stores and you'll see exactly what I am talking about, but bring some sunglasses.

Do they catch fish?

I see people having luck with them in the big magazines so I have to assume they work, but none of the baits I actually bought or painted, with the exception of firetiger patterns,  have worked all that great for me.   A few fish here and there, but nothing as productive as natural patterns.  And as my experience with those color schemes is limited by where I fish, I really have no more room or inclination to argue the topic at this point in time.  I'll keep trying them to see if my success rates go up with them in the future, if only for the sake of satisfying my curiosity.  And who knows, maybe I'll change my tune.  After all, look at some of the ungodly color combos for salmon, trout and steelhead...and they are proven...

So, where do I go from here? What should I be painting?

Natural patterns are where I believe, through experience and success rates,  is where my focus should be.  Trying to mimic what nature has provided them as a food source.  Get the basic profile, length and color scheme in place and your odds of slaying some beasts improve.

Ok.  Another step in the right direction..  What natural pattern should that be?

Arguably, there are tons of different kind of baitfish in the area, like fathead minnows or emerald shiners.  I could (and probably will paint up a few of each).  However, the more I looked, it was obvious one forage fish was at the forefront.

Shad.  Gizzard shad especially as their threadfin cousins apparently do to well this far north, being susceptible to cold water die offs.

So in this neck of the woods, its almost all gizzard shad.  On the bigger reservoirs, all the way to Oahe, they are the primary source of forage for all types of fish.

I have painted shad patterns in the past.  Several different patterns to be specific.  All have had some modest success.  But I wanted something better, or at least in my mind, looked better in the water..

Enter the Bogstalker Shad pattern.  

This is the photo I opted to use for reference purposes.  Its relatively generic but representative of the color scheme I come across in shad most often, especially a little further north.

And this is actually the problem.  Different bodies of water produce shad with varying color schemes, as fish mature. The coloration of the male and female fish of a species can vary dramatically as well.   Finally, those fish that best blend in with their surroundings and environment have a much better chance of survival than those that don't.  Thus the perpetuation of different colorations of the same species of fish.

So in order to attempt this pattern, I again chose this specific blank as I did the cold water bluegill pattern.  

It has a vaguely similar profile and was small enough.  If I would have had any shad rap style blanks on hand, I would have opted for them instead.

First things first.  Ensure the bait is clean and free from oils, dirt or grime.  Was in soap or if necessary some other non reactive cleaner like windex or rubbing alcohol.

After the washing, allow it to dry thoroughly, checking to see if there are any leaks in the blank.  If there are, and you see any fluid within the body, discard the blank.  There is no reason to try and save it, because the odds are not in your favor.

If there are no leaks, make sure your tape the diving bill of the lure up before you start priming the bait.

Here is the blank primed with a Rustoleum flat white primer coat.  I prefer this brand to others because it seems to adhere to the plastic better.  

It tends to be quick drying as long as you don't over apply it and other types of pain adhere to it extremely well.  Very few problems with it, and that in itself is a huge plus.

One or two light coats are all that is usually needed to get the bait covered.

I also have started allowing the prime coat to stand unpainted overnight, ensuring everything is dry and cured and ready for the next coat.


Once the primer coat(s) are dry, its time to apply the chroming base.

Fancy terminology for applying the chrome spray paint.  Again, Rustoleum gets the job done for me  quite nicely.

I've found that using the Chrome spray paint from Rustoleum, the best shiny finishes are those that are just lightly applied.  They tend to be brighter and darken much less when sealer is applied.

That last bit there is a major issue for almost all bait painters.  Keeping that chrome shine without actually having the bait chromed.  I've tried all sort of different things, techniques etc, with varying success.  This works for me right now so I'll be sticking with this unless I come across another product that does a better job.

Again, let the paint dry.  Since it was a light coat, it shouldn't be too much of an issue to paint over it directly after a few minutes.  You can speed the drying process up with a light touch from a heat gun if need be,

Normally, I don't bother taping up the sides of a bait to get a delineation of color, as I love to blend colors together naturally, but when looking at a shad, you can see the proverbial shad spot higher on the shoulder than most commercially manufactured baits offer.

I had a choice.  I could still try to blend everything together naturally, or tape the bait up and make a clean line (which I am also not a fan of).  For aesthetic purposes, I choose to make the clean lie in an area I knew would allow me to get the contrast of the shad spot the way I wanted.

I should also note that since I opted to go this direction, I allowed a further 24 hour dry time for the chrome paint to really set in.  Nothing worse than taping up a bait to get a line and then peeling the tape off and having half your paint come off with it.  Trust me...curse words ensue.

I used Createx Pearlized gold for this back coloring.  I probably would have again used a Rustoleum gold paint if I had it on hand.  This worked, but required a few light coats, all heat treated with a portable personal heater, but a heat gun would have worked also.

This is the bait after I allowed the last coating of Createx to dry for about 15 minutes.  I gently peeled the green tape off.

Note to anyone using the blue painters tape.  If you use it, understand it might (probably will) take off your chrome paint.  For some reason it adheres really hard to blanks and makes it difficult to get off without damaging the bait.  Use at your own peril.

As you can see, with the differences in color, the delineation between the gold and chrome isn't jarring.  They compliment each other quite well and overall look relatively natural

I went back to look at the reference photo at this point and overall, I was pretty satisfied.  Not perfect but as I have said before, nothing in nature ever is so don't panic if something is a little off.

The next step is to lightly apply a dark base to the back.  I usually turn down the air pressure on my airbrush and use Createx Opaque Black.  

On the initial spine coating, I hold the airbrush a little closer to the bait to get a more solid and tighter brush pattern.  The goal is to get the spine covered with little to no overspray. If I decide I want a bit more overspray, I just bring the airbrush back towards me, or further away from the blank, than I used the previous pass.

Now the reason why I do this will become apparent here in a few more steps.


Typical example of the lightly sprayed spine (back) of a blank with only minor overspray along the shoulders.  


While I still have the Creatix Opaque black in the airbrush, I turn the airbrush pressure down a little more and use a fine spray to highlight the eye sockets and parts of the gill plates.  

If you look at most fish, there is usually a darker pattern around  or very near their eyes, so this step helps replicate that, bringing a balance of natural order to something that is not natural.  

Pay attention to darkening the nose and mouth areas as well, right above the diving bill.  Its very easy to forget to paint this small yet crucial area.


If necessary, add a few more drops of Createx Opaque Black to your airbrush.  Shouldn't take too much as we are now going to create the "shad spot" on the bait.  

Earlier I mentioned about limiting overspray along the shoulders of the bait for a reason.  This step is partially for that reason.  

Your air pressure should already be lowered, so keep it at that pressure and  using your trigger control, gently  ease the spot onto the bait.  

If you prefer, you can use a circular stencil to get that perfect circle, or you can free-hand it.  I've seen live shad with both tightly circular spots and those with smudgy spots, so its entirely a personal preference choice.


Now, for the last reason for only lightly over spraying the blanks shoulder area.  We are going to add a new color into the mix,

So, clean out your airbrush very well and add Sepia.

Again in the cold water bluegill pattern I mentioned how important that relatively unknown color was to creating more realism to artificial lures than anything else.  

This pattern is no exception to that law.

I usually increase the pressure on my airbrush at this point, making a few test sprays and making further adjustments until I get the spray I am looking for.  

Starting at the spine, make a few light passes, making sure to get just enough overspray to cover the shoulders of the blank.  One to three light coats should get you in the ballpark.

As you put each coat on, you'll notice the blank looking more lifelike, but don't over do it.  You'll eventually hit a point where all you are doing is blackening or darkening the bait and your shad spot will just blend right in with it...not good. 

Worst part is that it is super easy to let happen.  

Remember what I said about applying sealants,  They do not only after silvers and chromes....its all colors.  You would think something meant to be clear would allow the colors to shine through brightly, but light refraction and sealant thickness cut down the amount of light coming through the sealant, thus darkening the bait.

Moderation and patience are your best friends when painting lures.  Don't over do it.

So here are the baits before getting sealed.  Ive taken the tape off the diving lips, added the eyes and am not waiting for the sealant to warm up a bit.  (topic for a another article)

I have the original reference photo beneath this so you can see for yourself, the match in coloration is pretty close.  

Referring to bait size, these baits are about 1/3 of the fish pictured, which is typically the size I am looking for during the late summer.


So until next time, 

keep those lines tight, the hooks sharp and the fish afraid


Sunday, January 17, 2021

SONGS OF ICE AND FIRE (OR 13 DIFFERENT WAYS TO KILL TIME UNTIL ICE OUT)


It's that time of year.  The holiday season is over and we've all just settled in for the "real" winter.  

The wind seems like it is always howling from the north, bringing with it that  lovely mixture of snow and miserable wind chill.  It snarls and growls at your doors and windows as it rushes by.

Then there are the other precious gifts nature has left in her wake.   Icicles hanging from your rooftop.  Your driveway and sidewalks are always drifted in, or you see your truck is buried ...again ...

To top it off,   the last time you checked you discovered your favorite body of water is frozen completely shut and all you can do now is sit in front of your fireplace and dream about ice-out and the first real days of spring.

 But we both know it's a long time between here and there.  Cue exasperated groaning and another shuffle step towards seasonal insanity. 

The long dark nights and short days drag this purgatorial period out far longer than it should actually last.  Kind of like one of those B-movie death scenes where it takes the guy 15 minutes to finally succumb to his injury.  Not pretty.

If you don't ice fish, like yours truly, this part of the year is truly the worst.  What is more worse, is that you have friends who do like to ice fish and they catch plenty in their heated shacks and portable huts.  They post their photos to social media and you are glad they are having a good time and being successful.   More power to them.  They can have it.

 So what else can you do to kill the time?

Fortunately, for you, I have a boatload of suggestions on how to keep so busy you'll swear winter just flew by. All based on decades of suffering through the dark days like these.  So my friend, toss another log on that fire, stoke those embers and sit back down because this might take a few minutes.


Suggestion 1: Clean out and re-arrange/organize tackle boxes

Tackleboxes get gnarly throughout the regular fishing season.  Tackle gets disorganized, jigheads and hooks mysteriously disappear into crevices, bits of gravel, sand and grass make their way onto the bottom, etc. etc.  

Now is as good as time as any to take everything out of it, clean it out and start reorganizing your tackle so its easy to find and easy to use.  Why wait to do it until last minute.  Make yourself useful.


Suggestion 2: Paint crankbaits, pour soft plastics or weights, or make crawler harnesses, hoochie rigs, tying flies etc

Ok.  Unless you have all or most of the stuff needed to accomplish any of these tasks, this might not help.  

However, if one of these things is something you want to learn about or more of, now is the time to jump at the opportunity.  You actually have the time to take a stab at some of these productive hobbies.

Hit the forums, group pages and other sources of information to gather what you need to know.

Suggestion 3: Plan out some fishing trips throughout the warm weather seasons

I try to use this downtime to my advantage any and every chance I get.  One of the things I do is start plotting out the new years fishing "campaign".  I identify several lakes or water bodies I've never been to before and incorporate trips to them within my regularly fishing schedule.  Part of planning to go to them involves trolling through archives of fishing reports to get a general idea on when is a really good time to go.  Nothing like driving 12 hours to a lake and find out no one has caught any fish the last month...

Suggestion 4: Read up on your favorites species of fish and refresh your angling awareness.

Cannot stress enough how important it is to read up on the latest information on your favorite species of fish, whether it involves new tactics to catch them, new insights on behavior, or new places to find them, any time you spend trying to improve your "game" is well spent.

Suggestion 5: Look for open water fishing opportunities

Ok, so nothing I have suggested so far trips your trigger.  You are looking to chuck and wind, soak some bait or what not.  Well, there always seem to be some open water options available if you are willing to try them.  Major river systems are often open and given the right conditions, can put out more than a few good fish, if you are really willing to brave the cold.  Don't let a little snow and ice deter you, but do practice safety, common sense and pay attention to your surroundings.  Getting soaked in winter is no joke.

Suggestion 6: Work on, clean or repair boat/kayak  and trailers (in heated garage)

I do believe that most of us who own boats and kayaks clean them up pretty well before winter hits, but there are individuals who don't.  If you are one of those individuals, and you have a heated garage, why not get the boat or kayak into the garage and get it cleaned up properly.  Start off the new year and fishing season right.

Suggestion 7:  Watch some fishing shows/videos

I think most of us do this already so this is almost habit, but if you don't, take some time to hit Youtube to find your favorite pro, or watch some TV shows.  While its not the same as being there, it does tend to get ones mind wandering into the right direction.  Plus, you never know what types of tips or tricks those guys might reveal.


Suggestion 8;  Watch some videos and learn more about your electronics.  And while you are at it, update them if needed.

Electronics. 

Don't care how good you think you are at reading them, odds are pretty high you're not as good as you think.  So why not use this down time to learn more about interpreting your sonar, how to get the most out of it,  and actually updating the software that runs it?

Dig out that user manual, really familiarize yourself with your units options and operation.  Electronics are some of the most valuable tools we have as anglers.  Learn how to use them to your advantage and to make you more successful on the water.

Suggestion 10:  Start stockpiling or making some road/trip snacks like jerky, trail mix, sticks, etc.

This might be one of my more favorite winter past times.  Getting some road grub made up ahead.  Grab and go.  Im talking trail mixes, jerkies, dehydrated fruit snacks, meat sticks etc.  

Everyone has their favorite gas station snacks.  It just seems each time you go into one to grab a quick snack it costs more than the last stop.  Drives me crazy.  How can an ounce or two of chips in about 6 ounces of air and a paper thing container cost me almost 2 freaking dollars?  Wrong answer.  Thats almost  the cost of a container of crawlers.

Save some money and make some up ahead of time...most specifically the meat sticks or jerky.  They freeze real well and damn, they are usually tasty. Deer, beef, turkey, goose or wildebeast, its all good when you are cruising down the road to your next fishing hole.  

As far as trail mixes, I have a personal recipe similar to the proverbial chex mix that makes awesome road grub.  I'll make some up a few months ahead of times, and use my vac sealer to keep it fresh.  It works great for dehydrated fruit snacks too.  

Suggestion 11: Get on the internet and start looking at expanding your horizons and scouting new lakes

Ok.  This has actually become a full time habit for me.  If I get a few spare moments, I'll hop on google and start searching state maps for lakes, rivers, reservoirs etc.  I love to check out general layouts, camping areas, area attractions, nearby amenities etc. And if I like what I see overhead, I'll make a note and then do further research at a later date and time.  

Its actually pretty important to get out and expand your fishing horizons.  Its all too easy to get locked into a single body of water and forget everything else.  It stifles growth, knowledge and who knows what kind of opportunities are missed.

The only time I would suggest actually really hammering on a single body of water is if you are completely intent on learning as much about it as you can and acknowledge it will come at the expense of other knowledge.


Suggestion 12: Get a head start on your new season by cleaning your reels and putting on fresh line

I do know a lot of people who neglect these items.  They never clean their reels, or ever put on fresh line.  They seem oblivious to the fact that dirt and dust get into your reels and sunlight silently and gradually damages your line.  The thought of replacing line isn't even on their radar.

So get a good start to your new year by hitting the water with fresh line and clean gear.  Clean gear will last you longer and provide more enjoyment than something that has sat neglected in your dusty garage for years.

Suggestion 13: Go through your tackle and sharpen or replace (when needed) all the hooks

I should have put this up there right next to the top, but this is a bit more intense.  Your tackle has hooks.  Crankbaits, jerkbaits, bladebaits, rattlebaits...they all have hooks.  Take the time to sharpen them all up, inspect them, and where needed, replace them with the correct size hook to keep them running right and to prevent losing any fish.  

Invest in a pair of good split ring pliers.  They are worth the money.

So, there you have some suggestions to kill some time.  I had some more but these ought to keep the average angler busy the rest of the winter.

Dont fret...spring is coming.  The ice will leave the lakes and streams and open water will be upon us all.  Keep the faith.

So until the next blog entry,